

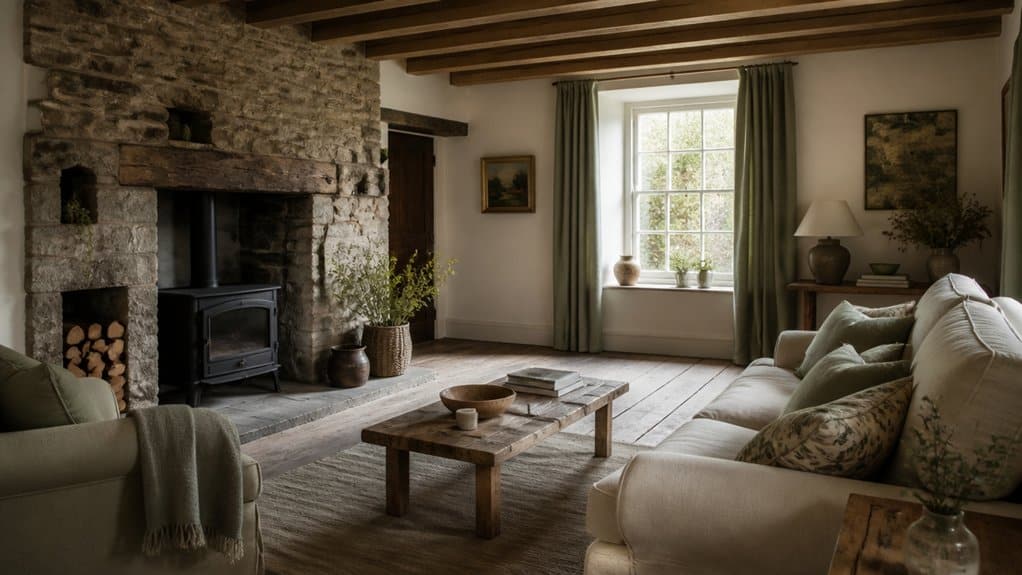
We feel that, where possible, preserving character features is essential. In a stone cottage with uneven floors and exposed beams, replacing every old feature can strip away the very character that makes the home special. As you plan a renovation, measure carefully, restore sound original details, and choose practical updates that suit the building’s scale. You can add comfort without making the rooms feel out of place—but the right balance depends on what you preserve, what you change, and how you bring each space together.
Plan Your Cottage Interior Renovation

A successful cottage renovation starts with a clear plan. Before you begin, list what isn’t working, what you need, and how you use each room.
Set a realistic budget, including a contingency for unexpected repairs, and decide which tasks require qualified tradespeople.
Measure rooms, doorways, and existing furnishings so you can choose suitable pieces and avoid costly fit problems.
Map furniture placement around everyday activities, keeping clear routes through compact spaces.
Consider storage early; built-ins, baskets, or multifunctional furniture can reduce clutter without crowding rooms.
Plan lighting schemes for each task and time of day, combining general, focused, and softer ambient light.
Check outlet locations and switch access before finalizing layouts.
Gather samples, dimensions, and product details in one project file, then sequence purchases and work to keep decisions consistent and spending under control.
Preserve Original Cottage Features
Preserve your cottage’s character by restoring original woodwork rather than replacing it. Keep exposed beams visible, and repair them with finishes suited to their age.
Highlight historic details with thoughtful lighting and restrained decor.
Restore Original Woodwork
When you restore original woodwork, you keep the cottage’s character while bringing worn features back to life. Begin by checking doors, skirting boards, architraves, and window frames for loose joints, rot, or insect damage. Photograph details before removing anything, and label each piece so you can reinstall it accurately.
For effective timber restoration, clean surfaces gently with a soft brush and mild soap; harsh sanding can erase tool marks and aged finishes. Tighten joints with suitable adhesive and discreet fixings, then replace only sections that can’t be repaired. Match new timber to the original species and profile.
Choose woodwork preservation methods that suit the existing finish. Test a small, hidden area before applying paint stripper, stain, or wax. If the coating may contain lead, use a qualified professional.
Maintain repaired woodwork with regular dusting and prompt attention to leaks or damp.
Preserve Exposed Beams
Exposed beams bring warmth and history to a cottage, so protect their character before making cosmetic changes. First, check each beam for cracks, insect activity, moisture, or movement. If you find structural damage, consult a qualified professional before covering or altering the timber.
Don’t assume every mark needs sanding; age-related wear often contributes to a beam’s integrity and appearance.
For routine exposed beams maintenance, dust with a soft brush and address leaks or condensation promptly. Use a wood cleaner only after testing it in an inconspicuous spot, and avoid harsh chemicals that can strip the surface.
If you need to refresh the color, research beam staining techniques suited to the wood species and existing finish. Apply a small test patch, then follow the product directions to achieve an even result without obscuring the timber’s natural grain or character.
Highlight Historic Details
Original cottage features—such as paneled doors, stone fireplaces, and built-in cupboards—can give a room its character. Preserve these details before updating finishes, and assess their condition carefully. Repair loose joints, damaged plaster, or worn hardware with methods that suit the home’s age; avoid replacing sound materials simply to achieve a uniform look.
Look for hidden architectural features behind later additions, including old niches, timber trim, or original flooring. Consult a conservation professional before removing structural elements or uncovering fragile surfaces.
To make historic details stand out, keep nearby colors and furnishings restrained, and use layered lighting to reveal texture without exposing materials to heat or moisture.
Choose vintage decorative accents that complement the cottage’s period, but don’t overcrowd shelves or mantels. You’ll create a balanced interior that honors its history while remaining practical for everyday living.
Choose Colours and Finishes That Fit
Choose colours and finishes that complement your cottage’s character while standing up to everyday use. Build a Color palette around the home’s existing features, such as exposed beams, stonework, or original trim. Soft, muted shades often suit older interiors, but you can introduce deeper tones in smaller areas for contrast. Test samples in different light before committing; cottage rooms can shift noticeably from morning to evening.
Select finish materials for durability as well as appearance. Limewash or breathable mineral paint can work well on older walls, while washable finishes suit busy spaces.
Choose wood treatments that protect surfaces without concealing their grain, and use natural textures to add warmth. Keep sheen levels consistent across adjoining rooms to create a calm flow. Your choices should support the architecture, not compete with it, and remain practical for daily life.
Update the Cottage Kitchen
Update the cottage kitchen without losing the character that makes it feel at home. Keep original features such as exposed beams, a farmhouse sink, or worn floorboards; repair them where needed rather than replacing them.
Then improve daily function with discreet upgrades. Add task lighting beneath cabinets, install efficient taps, and choose durable worktops that complement the finishes you selected.
Vintage appliances can provide period charm, but check their condition, energy use, and service options before buying. If you prefer modern models, select simple designs that sit comfortably with the room’s age.
Use open shelving for frequently used dishes, and keep displays edited so shelves stay practical, not cluttered.
Finally, plan storage around how you cook, reserving accessible space for cookware and pantry essentials. Small, considered changes can make your kitchen work better while preserving its distinctive character.
Make Living Rooms Cosier and More Useful
After improving the kitchen, turn to the living room, where comfort and practical use should shape each decision.
Start by identifying how you use the space: reading, entertaining, or relaxing. Then plan furniture arrangements around those activities, keeping clear paths through the room and preserving access to windows, doors, and original features.
A sofa facing the fireplace can make it a natural focal point; add chairs that invite conversation without crowding the hearth. Choose appropriately sized tables and storage so everyday items stay within reach, yet the room feels open.
Layer rugs to define seating areas and soften hard floors, while curtains can frame windows and help the room feel settled.
Consider outdoor landscaping, too: views of a garden or courtyard can extend the living room’s sense of space and connect it with the cottage’s setting.
Add Modern Comfort Without Losing Character

Modern comfort works best when it supports a cottage’s character rather than competing with it. Choose Modern amenities that solve everyday problems while respecting the home’s scale and original features. For example, you can add efficient heating, discreet insulation, or updated plumbing without covering exposed beams, altering a fireplace, or removing old doors.
Ask a qualified professional to assess historic materials before you make structural changes; the right advice can prevent costly damage.
Balance practical upgrades with Vintage accents that feel collected, not staged. Keep a well-loved table, restore a useful cupboard, or pair an original feature with simple, contemporary furnishings. You don’t need to reproduce every period detail.
Instead, let authentic elements lead, then select modern pieces for comfort, durability, and easy maintenance. This approach gives you a cottage that works beautifully today and still feels rooted in its past.
Finish With Cottage Lighting and Details
Choose warm, layered lighting to make each room feel inviting and functional. Use fixtures and placement to highlight original beams, trim, or other cottage character.
Finish with a few thoughtful details that add personality without clutter.
Choose Warm, Layered Lighting
To complete a cottage interior, layer warm light from several sources instead of relying on a single overhead fixture. Choose bulbs around 2700K to create a welcoming ambient glow without making rooms feel dim.
Add table lamps beside seating, floor lamps in shadowed corners, and wall sconces where you need focused light. In kitchens, combine pendant fixtures with under-cabinet lighting so you can prep comfortably and soften the room after dinner.
Install dimmers to adjust brightness for different tasks and times of day. Keep shades and fixtures in scale with each room, and use opaque or fabric shades to diffuse harsh glare.
This layered illumination gives you flexibility while preserving a relaxed cottage mood. Check that switches are easy to reach, and choose efficient LEDs for dependable, low-heat performance.
Highlight Original Character
Once you’ve layered the lighting, use it to draw attention to the cottage features that give your home its character. Aim a wall light toward exposed beams, or position a table lamp to reveal the texture of original stonework. Use focused, warm light to bring out details without making the room feel staged.
Let historic elements lead your choices. If you’ve kept a fireplace, timber floor, or built-in cupboard, avoid blocking it with oversized furniture. Choose furnishing styles that complement the cottage’s age and scale, while allowing original features to remain visible.
You can also connect the interior to exterior landscaping by framing garden views with clear sightlines and lighting nearby windows gently. Keep the effect restrained: thoughtful illumination should clarify the architecture, not compete with it. This approach preserves character while making your cottage feel comfortable and lived in.
Add Thoughtful Finishing Touches
With the cottage’s original features in view, finish the room with lighting and details that make it feel personal and inviting. Choose fixtures that suit the home’s scale and age: a simple pendant, shaded wall lights, or a restored lamp can add warmth without competing with exposed beams or stonework. Layer task and ambient lighting so you can adjust the mood and use each area comfortably.
Add a few meaningful objects, such as handmade pottery, framed family photographs, or locally sourced textiles. Let these details complement existing materials rather than crowd them. Avoid artificial textures that imitate natural finishes; authentic wood, wool, and linen will sit more comfortably alongside original features.
Use minimalist accents to keep the look calm, and leave surfaces clear enough for the cottage’s character to remain the focus.
Frequently Asked Questions
Do I Need Planning Permission to Renovate a Cottage?
Usually, you don’t need planning permission for routine cottage renovations, but rules can change the picture. You can often repair or alter interiors without approval.
However, major extensions, changes to the Cottage exterior, or garden landscaping may require permission. If your cottage is listed or sits in a conservation area, stricter controls apply.
Check with your local planning authority before work begins; a quick enquiry can prevent costly delays and keep your project on solid ground.
How Can I Budget for Unexpected Renovation Costs?
Build a contingency into your renovation budget before work begins. Start with a detailed Cost estimation, including materials, labour, permits, and known repairs.
Then add 15–20% for surprises, or more if your cottage has hidden defects. Keep this Emergency fund separate from your everyday spending, and don’t commit it to upgrades.
Ask contractors for itemised quotes, track costs weekly, and approve changes in writing so you can spot overruns early and adjust plans.
Should I Hire an Architect or an Interior Designer?
For structural changes, hire an architect; for finishes and furnishings, choose an interior designer—unless you want a small renovation to become a colossal, budget-devouring saga.
If your cottage needs both, bring in both professionals and define their roles early. An architect can assess safety, approvals, and Historic preservation requirements, while a designer can refine your interior layout and select compatible materials.
Ask each for relevant experience, fees, and a clear scope before you commit.
How Long Does a Typical Cottage Renovation Take?
A typical cottage renovation takes three to six months, though you may need longer for major structural work, planning approvals, or specialist materials.
Your schedule also depends on contractor availability and the property’s condition.
If you’re updating the Cottage exterior or adding Garden landscaping, include those tasks in your timeline; weather can delay both.
Ask your builder for a detailed schedule, confirm lead times early, and allow a contingency for unexpected repairs before work begins.
What Insurance Should I Arrange Before Work Begins?
Before work begins, build an insurance safety net as carefully as you’d lay a foundation. Arrange renovation insurance coverage that protects the existing cottage, building materials, and completed work against damage, theft, and liability.
Tell your home insurer about the project; your standard policy may exclude major renovations. Confirm your contractor carries public liability and employers’ liability insurance, and request proof.
Check whether renovation permits or specialist trades require additional cover, and keep documentation accessible throughout the project.
Leave a Reply